
")
Ok guys, I’m far from a “professional” on this topic but I consider myself fairly knowledgeable. Detailing is definitely a passion of mine so I figured I’d go ahead and give those of you with little detailing experience a guide to washing/detailing your car the RIGHT way. Emphasis on RIGHT.
So you love your car. Mine happens to be a 2014 Ford Focus ST. Even though it’s a depreciating asset, you consider it an investment and want it to stay in tip-top shape so that 1, it looks good, and 2, the paint isn’t in such rough condition that the car loses value. I’m going to try to help you achieve those goals but know that there are no short cuts to detailing. If you want to do this the RIGHT way you’re going to have to spend a little money on quality products and invest some time each week.
With that said, let’s go over the products that you’re going to need for a basic wash:
- A hose…DUH
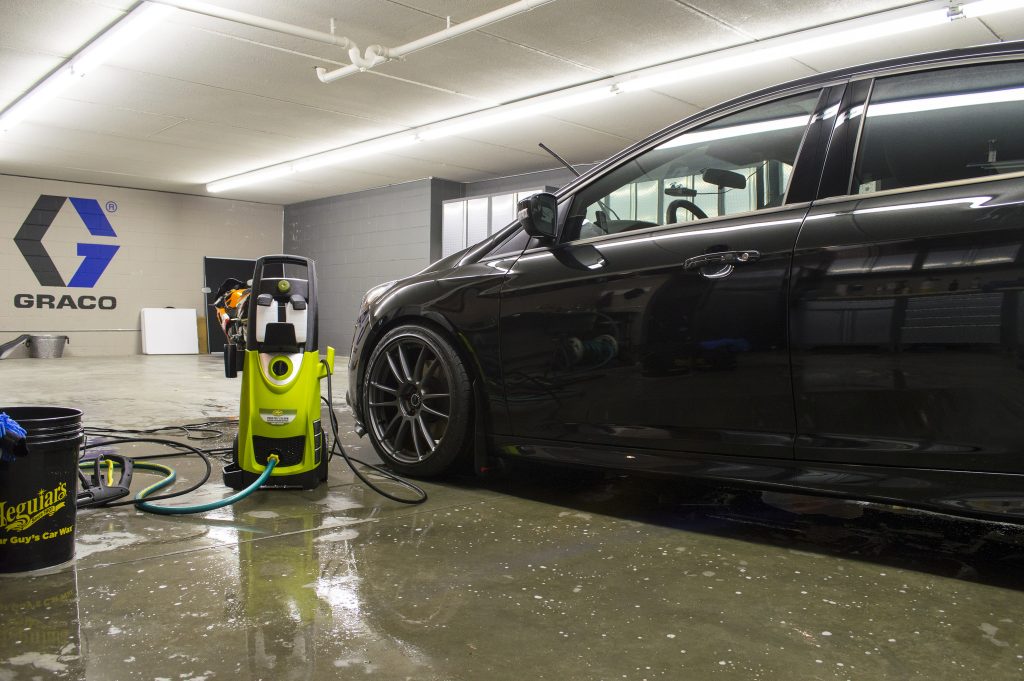
- A pressure washer or hose attachment (If you have the $$$ I highly recommend a pressure washer, works worlds better than just a hose)
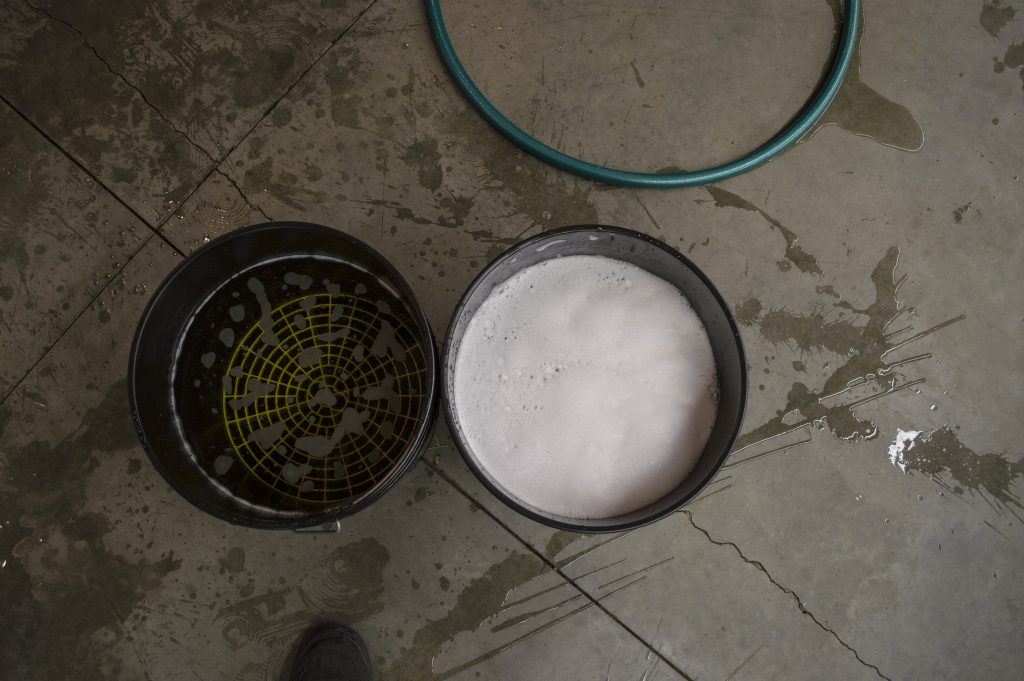
- Two 5 gallon buckets and TWO grit guards
- Two (at least) quality wash mitts–more on those later
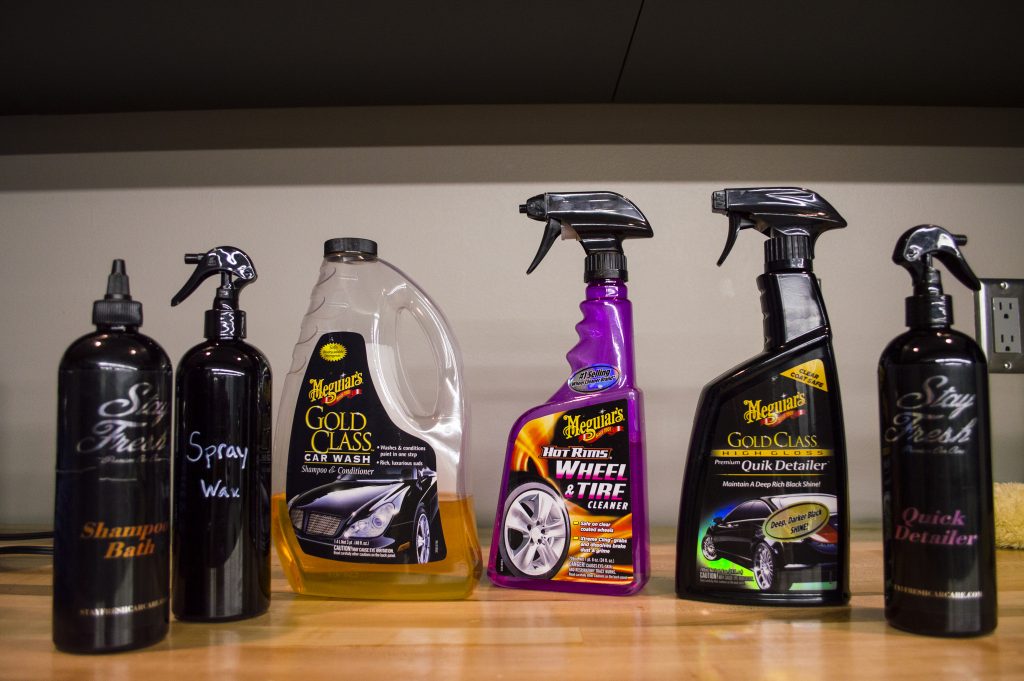
- Car soap, I used Stay Fresh Car Care shampoo bath and Meguiar’s Gold for this wash
- Detail spray
- Spray wax/sealant
- Wheel/tire cleaner
- Tire dressing (optional)
- Various wheel brushes
- Foam cannon…again, this is highly recommended but not a necessity
- Waffle weave towels, various microfiber towels, and terry cloths
- Air compressor, leaf blower, or other sort of blower…again, not necessary, but will really help cut down water spots
So, where do you start? Good question. The first rule of detailing…you need to be prepared before you start washing. Get your buckets filled, your foam cannon ready, your air compressor charged, your towels laid out, your products laid out, etc.
The reason you’ll need two buckets is to perform a proper two bucket wash method. This method, when used properly, will virtually eliminate swirling in your paint. The grit guards are not optional. Simply put, one bucket will be used for rinsing off your mitt and the other will be for your soap. So, fill one bucket with just water, and fill another bucket with a water/soap mixture.
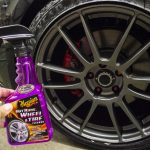
Once you have everything ready to go, the first step of your wash is the wheels. Start by spraying them down with your pressure washer or hose. Get as much brake dust off as possible. Once you’ve sprayed the wheels off, apply your wheel cleaner. I’ve been using this Meguiar’s product for years with great results. You can get it off Amazon for $4 a bottle. After you spray the wheels, give the cleaner time to set in and you’ll see it working its magic by the changing of color.
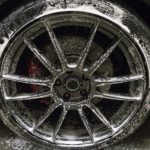
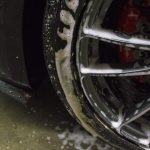
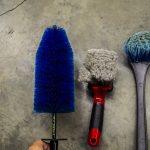
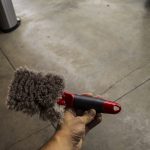
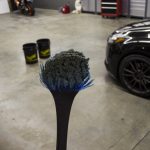
At this point, you’re going to take your wheel brush(es) and scrub off the brake dust. Prior to this time, I had only used the red Meguiar’s brush and the long handled grey/blue brush. This time I tried the EZ Detail brush (in the blue) and it is hands down the best wheel brush I’ve ever used. You owe it to your wheels to buy one! I used the EZ Detail brush on the spokes and interior of the wheel, the red Meguiar’s brush on the hub, and the long handled brush on the tires. Make sure you use a separate brush on the tires as they are usually the dirtiest part of the wheel and you don’t want to turn your wheels black again. Do not dry your wheels off just yet because they’re going to get wet again.
Now that the wheels are clean, it’s time to do the rest of the car. Rinse the entire car off by starting at the top and working your way down. Make sure you get the mirrors, which are a bug trap. Don’t hit your hose on the front bumper like I did
After you’ve sprayed the whole car down, if you have a foam cannon, blast the car with that. If you don’t have a foam cannon, now is when you start to “wash” the car. Take your first wash mitt, put it in the soapy water, then start washing the roof. *Important* Don’t be too aggressive while washing. Your goal is not to scrub at the paint because that’s how you get swirls. What you want to do is glide over the paint, flipping your wash mitt over as you go. After each panel you scrub, place your wash mitt in the rinse (no soap) bucket and rub it on the grit guard to get any dirt off of it. Then place it back in the wash bucket and proceed to do your next panel.
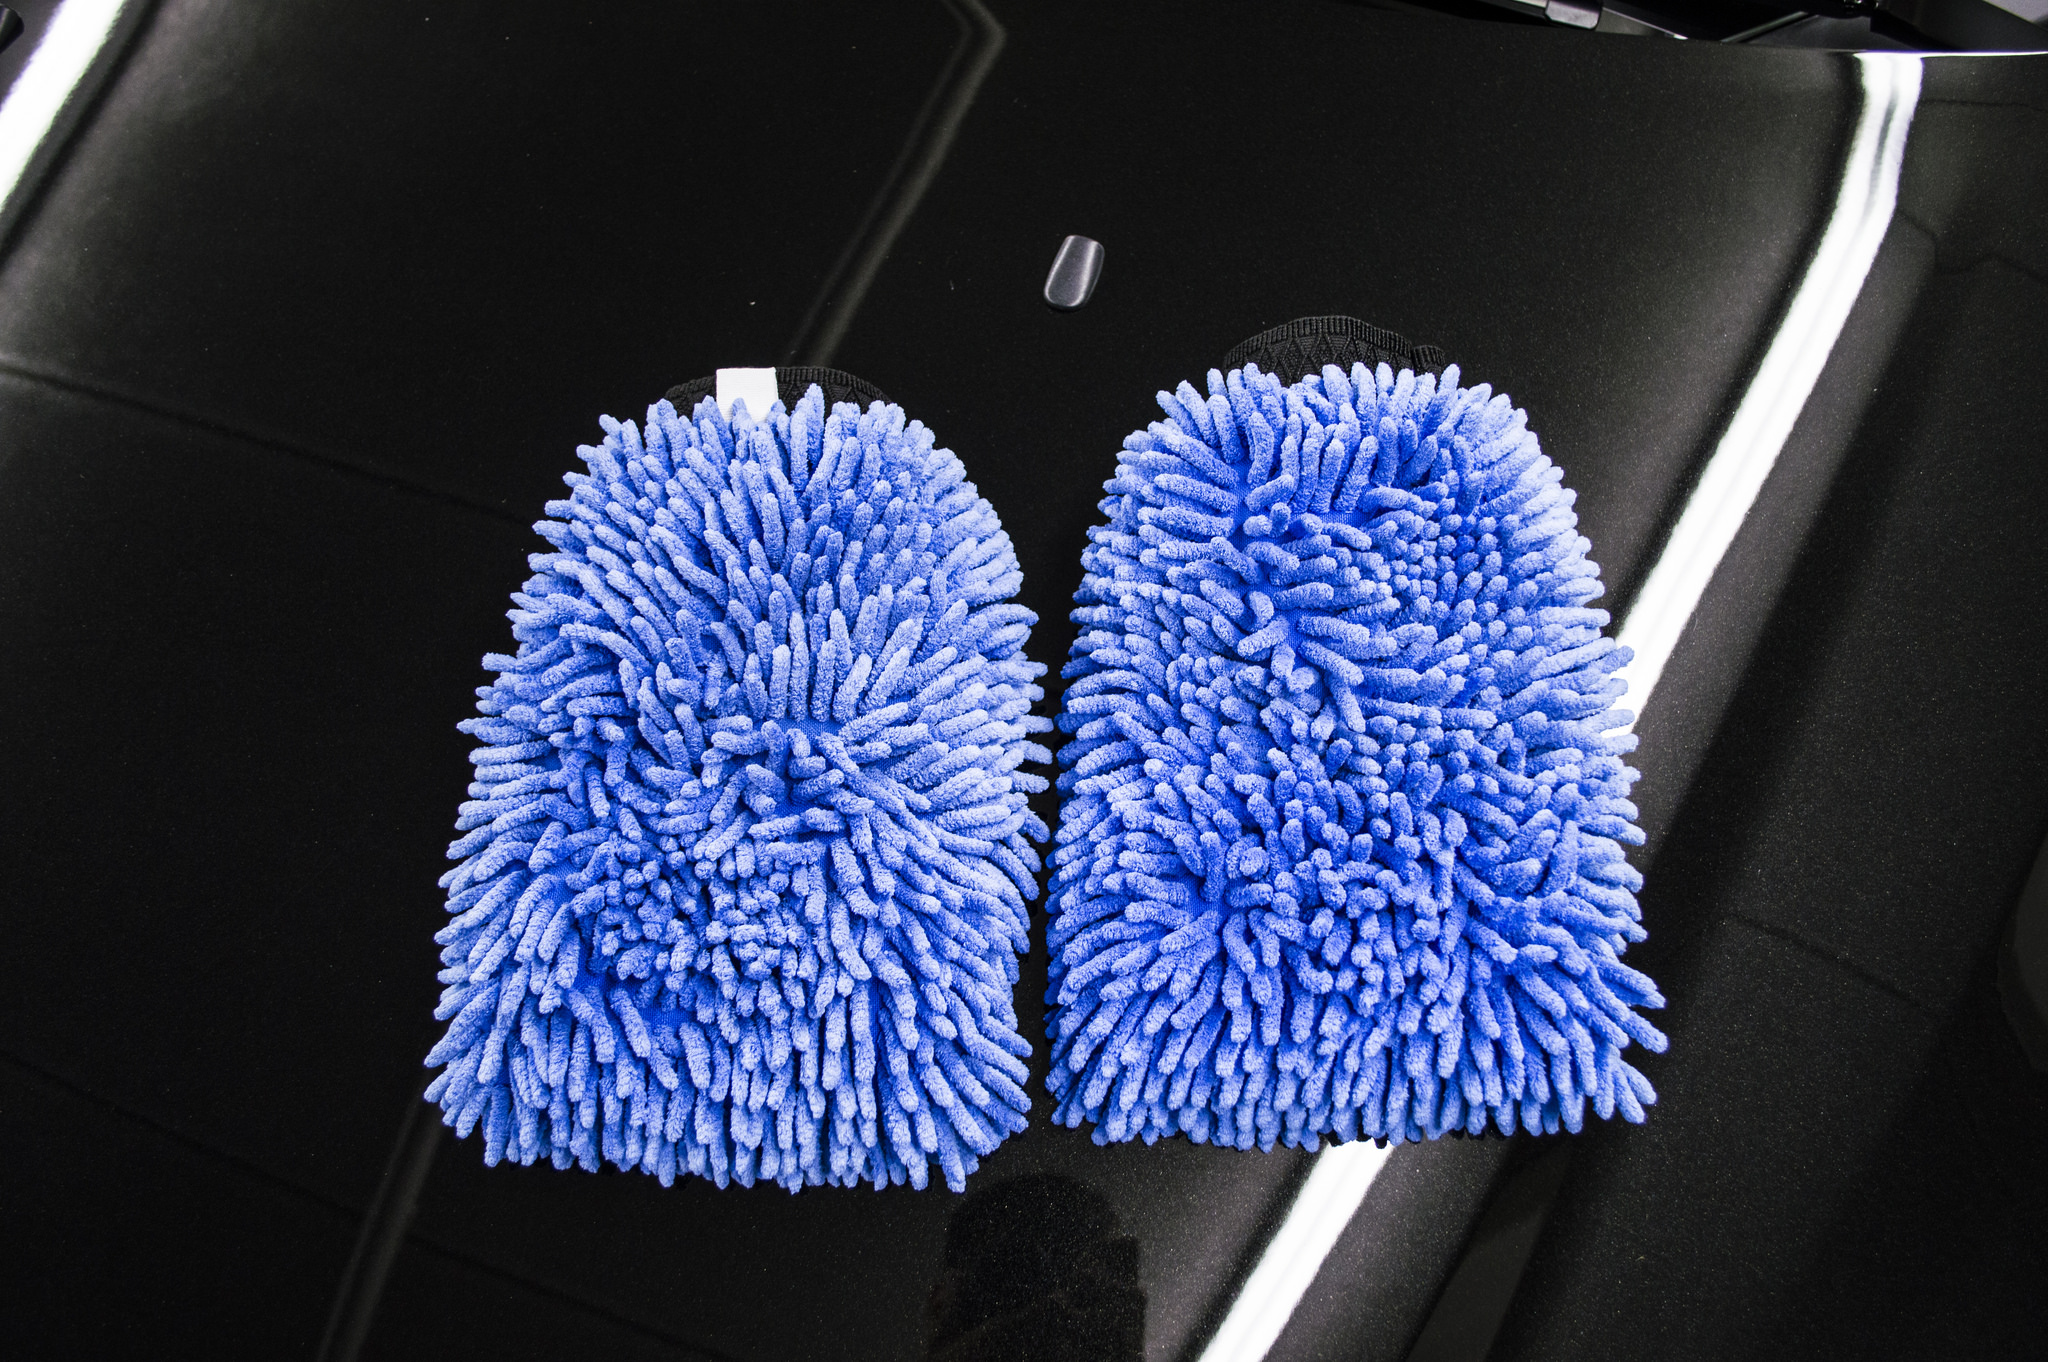
Continue this process for the TOP HALF of the car. That’s why you bought two wash mitts. With the first mitt I do the roof, hood, windows, mirrors, and the top half of the doors. Usually there is a body line on your car which is an easy cutoff point. I use the second mitt (same process as the first) to do the bumpers, rear hatch/trunk, and the bottom half of the doors.
*Note* Depending on how dirty your car is, you may have to rinse off the mitt more frequently. If you notice a lot of resistance while washing, that’s dirt you’re picking up and you’re going to want to flip and/or rinse off your mitt so you don’t swirl your paint.
Once you’ve washed the entire car, hose all of the soap off. I’ve noticed that soap likes to cling in the mirrors and in the seams of the rear windshield so make sure you hit those areas extra good! When the soap is all hosed off you’re going to do what’s called a pooling rinse. The purpose of this is to get the water to “bead up” and “sheet” off the car. It’s an interesting concept because you’re essentially using water to dry the car. Here is a good video on how it is done:
After you have completed your pooling rinse, take you air compressor or leaf blower out and blow water out of all the cracks. The “high maintenance” areas when it comes to holding onto water are the mirrors, the top of the rear hatch, the seam of the rear windshield, door handles, lug nuts, and the grille. If you don’t have an air compressor or leaf blower you can move onto drying the car.
Now onto your final and, in my opinion, the most important part: drying! You’re going to get out your waffle weave microfiber towels. If you don’t have any waffle weave towels buy some now! The rag company Dry Me A River is priced right and works great! The only problem I have with them is that their rags smell like an old lady’s house… but I get over it.
You’re also going to need detail spray. This is used to lubricate the paint/towel as you dry, adding a layer of protection against swirls.
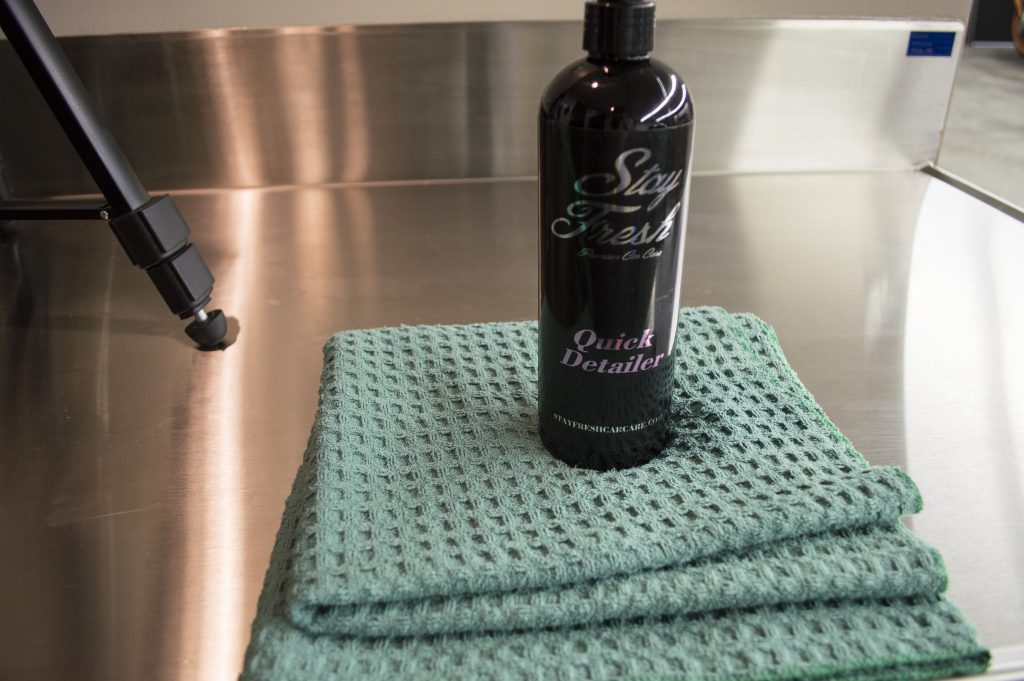
Start by folding your towel twice so you have 4 sides to dry with. Spritz the area you’ll be drying with your detail spray. You don’t need a lot. Begin wiping the car down with your waffle weave. As the towel begins to get wet, flip it to a fresh side and continue drying.
Make sure you aren’t letting the towel touch the ground, tires, wheel wells, or anything else that may have grit on it. If you pick up dirt and then proceed to rub it into your paint, you’ll swirl/scratch the hell out of it. By the end, you’ll probably wind up using 2-3 waffle weaves per wash depending on how well you did your pooling rinse. I’d recommend getting 6+ waffle weaves so you don’t have to wash towels each week!
*Tip* The rear hatch and doors like to leak out water. I’ve found that the best solution to this problem is to open and firmly close each one 3 times before drying. This should get 99% of the water out and help maintain your sanity.
One more optional step after you’re done washing is to apply a spray wax. This will keep your paint protected between each real waxing. I did a full detail on my car this night so I didn’t do a spray wax. The full detail includes a clay bar and polish. This proves that once you do a full detail, a proper weekly maintenance wash followed by a spray wax can keep your car looking flawless. Do you have to wash your car weekly for this to work? No. But keeping up on the paint and not letting it get super dirty will make your washes less time consuming, and help ensure you don’t swirl your paint.
Now that you’re done drying pack away all your gear, crack open a cold one, and admire your work!


-Words by Zack Sheahan